Mostrar mensagens com a etiqueta Chocolate. Mostrar todas as mensagens

quarta-feira, 14 de janeiro de 2015

Bolachas com pepitas de chocolate | Chocolate Chip Cookies


Lembram-se deste artigo que partilhei na página do facebook com uma lista de 25 formas diferentes de comer bolachas com pepitas de chocolate, originalmente chamadas "Chocolate chip cookies"?


Pois bem, tinha dito que iria experimentar uma dessas receitas e assim foi. Confesso que foi difícil escolher no meio de tanta tentação! Acabei por arriscar no número 7. Uma receita do blog Cooking Classy de bolachas recheadas com marshmallows e chocolate derretido!!!... Mmmmmmm!!!!! Um crime! Um atentado a qualquer dieta! Não há palavras para descrever... Mas antes que se assustem, destas só fiz 3 para a fotografia, e destas 3 só comi uma! ;) são realmente óptimas mas demasiado doces, uma verdadeira bomba calórica completamente desnecessária! Estas bolachas são, por si só, uma delícia! É impossível comer só uma! E, mais ainda, é difícil parar!


Resultou tão bem que depois da primeira, já repeti umas 5 vezes (sem os marshmallows, claro!). São óptimas para acompanhar o café (para mim, uma das melhores combinações que existe!), mas são bem vindas a qualquer hora do dia!... 

São um clássico americano, por isso encontra-se na internet milhares de diferentes receitas, embora todas muito semelhantes. Alguns ingredientes ou quantidades diferentes aqui e ali, mas a base é a mesma! Já experimentei três receitas diferentes, mas para mim, sem margem para dúvidas, é esta a melhor!


Remember an article I shared on Facebook with a list of 25 different ways to eat chocolate chip cookies?

Well, I told you that I would try one of those recipes and so it was! I must say it was hard to choose in between so much temptation! I took a chance on number 7. A recipe from the blog Cooking Classy of cookies filled with marshmallows and melted chocolate!!!.... Mmmmmmmm!!!! A crime against any diet! No words to describe it... But before you freak out, I only made 3 of them and out of those 3 I only ate 1! ;) They really are delicious but way too sweet - a completely unnecessary caloric bomb! But it's really hard to stop eating them!

It worked out so well that I already repeated the recipe about 5 times (without the marshmallows, of course!). They are really great to go with a cup of coffee (best combo ever), but they taste great whenever you want to have them! :)

They are an american classic so you can find a thousand different recipes on the internet, even though they pretty much all look alike. Some different ingredients/amounts here and there, but the base is always the same! I already tried 3 different recipes but for me, this is definitely the best! 


BOLACHAS COM PEPITAS DE CHOCOLATE
(CHOCOLATE CHIP COOKIES)


Ingredientes
Ingredients

630g de farinha
1 colher de sopa de Maizena
1 colher de chá de fermento em pó
3/4 colher de chá sal
1 chávena de manteiga derretida
300g de açúcar amarelo
2 ovos grandes
2 colheres de chá de extracto de baunilha
340g de pepitas de chocolate
Marshmallows (opcional)
Chocolate para derreter (opcional)


2 2/3 cups flour

1 tbs cornstarch
1 tsp baking soda
3/4 tsp salt
1 cup melted butter
1 1/4 cup packed light brown sugar
2 large eggs 
2 tsp vanilla extract
12 oz chocolate chips
Marshmallows (optional)
Chocolate to melt (optional)

Preparação
Preparation


Pré aquecer o forno a 180ºC.

Numa taça, misturar a farinha, a Maizena, o fermento e o sal.

Preheat the oven to 360 degrees.

In a mixing bowl, whisk together flour, cornstarch, baking soda and salt.


Numa taça grande, bater a margarina com os açúcares até obter um creme, durante cerca de 1 minuto.

In a big bowl, blend together butter, brown sugar and granulated sugar until creamy, about 1 minute.


Adicionar os ovos, um a um, batendo bem entre cada adição e juntar o extracto de baunilha.

Mix in eggs one at a time and stir in vanilla extract.


Reduzir a velocidade da batedeira e juntar aos poucos a farinha até ficar tudo bem misturado.

With the mixer set on low speed, slowly add in flour mixture and blend just until combined.


Juntar as pepitas de chocolate.

Mix in the chocolate chips.


Fazer bolas de massa com a ajuda de duas colheres e colocar num tabuleiro de forno, forrado com papel vegetal, com um espaçamento de cerca de 5cm.

Shape dough with 2 spoons and set on slipat or parchment paper lined baking sheets, spacing 2 inches apart.


Levar ao forno durante 9-12 minutos e deixar arrefecer completamente.

Bake for 9-12 minutes and allow to cool completely.


Se quiserem perder a cabeça e experimentar o recheio de marshmallows e chocolate, basta derreter o chocolate no microondas e tostar os marshmallows sobre uma chama (rodando sempre até que fiquem dourados). Espalhar um bocadinho de chocolate na parte de baixo das bolachas, colocar 1 a 2 marshmallows por cima e cobrir com mais uma bolacha. Devem ser servidas de imediato.

If you want to try the marshmallows and chocolate filling, just need to melt the chocolate in the microwave and toast the marshmallows over a fire pit (rotating occasionally until golden). Spread chocolate over the bottom side of half of the cookies. Place 1 or 2 marshmallows over chocolate and top with another cookie. Serve immediately.

segunda-feira, 14 de julho de 2014

Macarons de baunilha com chocolate | Vanilla macarons with chocolate


Há 4 meses, este blog começou com uma receita de Macarons! Um bocadinho ousado para quem está a iniciar-se nestas andanças, não? Uma principiante a achar-se profissional! Eu sou daquelas que olha para as fotografias dos cozinheiros e pasteleiros profissionais e penso que o meu resultado vai ser igual... É claro que não! Muito menos com receitas difíceis como são os macarons! Mas a verdade é que nestes 4 meses, sinto que já aprendi bastante e noto uma progressão nas minhas tácticas e habilidades. Fico furiosa quando as coisas falham, mas tem que haver sempre uma razão. Se não ficou perfeito, tenho que respirar fundo e tentar perceber o que falhou para não errar da próxima vez! E como tenho uns amigos muito queridos, estão sempre preparados para receber as minhas novidades, ainda que tenham sido um desastre. E mais do que isso, sempre com palavras bonitas de incentivo!

Lembro-me que na altura disse que não tinham ficado tão perfeitinhos como tinha imaginado, mas que sabia o que tinha falhado e ia tentar melhorar da próxima vez! A verdade é que consegui, mas ainda assim, continuam longe da perfeição (ou pelo menos do que eu espero!). Não se trata de uma receita muito complicada, com muitos passos para seguir. Aliás, é bastante simples e rápida, mas a questão é que é muito fácil falhar e um pequenino descuido pode arruinar todo o trabalho! E a minha principal dificuldade é conseguir fazer círculos todos iguais com a massa. No entanto, espero que com a ajuda de uma base própria para Macarons que já está encomendada, da próxima vez vos possa trazer "Os melhores Macarons do mundo"!!!! Também tenho estado a estudar várias receitas de vários autores para tentar perceber o que pode funcionar melhor e fazer diferentes experiências.


Four months ago, I started this blog with a recipe for Macarons! A bit bold for who was just starting out, no? A beginner thinking that she’s a professional! I am one of those people that looks at the pictures taken to the dishes made by professional bakers and cooks and believe that mine will be just alike… Of course they never do!... Let alone with such hard recipes as Macarons! But the truth is that during these 4 months, I believe that I have learned a lot and I can feel that I’m getting better at some cooking skills. I am really angry when things don’t turn out the way I want them to but there must be always a logical reason. If it’s not perfect, I have to take a deep breath, realize what went wrong and don’t let it happen again in the future! I can always count on my dear friends who are always ready to try my things, even if they are a disaster. Even better, they still cheer me up and encourage me more with nice words!

I remember that at the time, I told that they were not as perfect as I wanted to but that I knew what had went wrong and I should try to fix it next time! The truth is that I was able to do it but still they are very far away from perfection! It’s not that it’s a difficult recipe with a lot of steps to follow… It’s actually pretty simple and quick but the thing is that it’s really easy to screw up and a little thing can ruin the whole work! My biggest issue is to make similar circles. Nevertheless, I already ordered a base specially for the making of Macarons and I hope that it will help me to get there and bring you the “World’s best Macarons” next time. I have also been studying several recipes by different authors to try to understand what can work better and make different experiences.


Esta receita é, tal como a anterior, da Manuela Kjeilen e foi retirada do livro "Love, Manuela". É muito semelhante à que partilhei anteriormente, mas as quantidades são ligeiramente diferentes. O recheio original dos Macarons é um creme de manteiga e açúcar. Para estes, fiz uma simples ganache de chocolate (achei o contraste do preto e branco um máximo), mas pode ser aquele que mais gostarem ou vos apetecer no momento.

E vocês, já experimentaram fazer? Algumas dicas para partilhar?


Like its predecessor, this recipe belongs to Manuela Kjeilen and it’s copied out of the book “Love, Manuela”. It’s really similar to the previous recipe but the amounts are a bit different. O original filing is a butter and sugar cream but for these ones, I made a simple chocolate ganache (I really loved the black/white contrast), but you can just make the one you like best.

Have you already tried to make Macarons?! Any tips for me to share?

The Baking Nanny


MACARONS DE BAUNILHA COM CHOCOLATE
VANILLA MACARONS WITH CHOCOLATE


Ingredientes (30 macarons)
Ingredients (30 macarons)

150g de amêndoas moídas e peneiradas
150g de açúcar em pó
120g de claras de ovo (preferencialmente frias)
150g de açúcar para a calda de açúcar
50mL de água para a calda de açúcar
1/2 vagem de baunilha (sementes)
35g de açúcar
200g de chocolate de culinária de boa qualidade
100g de natas

150g grinded and sifted almonds
150g icing sugar
120g egg whites
150g sugar for the sugar syrup
50mL water for the sugar syrup
1/2 vanille bean (seeds)
35g sugar

200g dark chocolate (good quality)
100g cream

Preparação
Preparation

Pré aquecer o forno a 160ºC.

Numa taça, colocar a farinha de amêndoa com o açúcar em pó. Juntar metade das claras e misturar bem.

In a bowl, put the almond flour with the icing sugar. Add half of the egg whites and mix it well.


Colocar a outra parte das claras noutra taça, juntar as sementes de baunilha e bater até obter um merengue. Sem desligar a batedeira, juntar as 35g de açúcar e bater até o açúcar se dissolver.

Para a calda de açúcar, juntar o açúcar e a água num tachinho. Aquecer em temperatura máxima, até atingir os 118ºC (cerca de 4 minutos).

Juntar, cuidadosamente, a calda de açúcar ao merengue, batendo sempre até obter uma mistura brilhante (cerca de 15 minutos).

Put the other half of the egg whites in another bowl, add the vanilla seeds and whisk it until get a meringue. Whithout switch off the food mixer, add the 35g of sugar and whisk it until the sugar be dissolved in.

For the sugar syrup, put the sugar and the water in a small pan. Heat it at high temperature until gets 118ºC (for about 4 minutes).

Add, carefully, the sugar syrup to the meringue, whisking until it turns shiny (for about 15 minutes).


Juntar aos poucos a mistura inicial de amêndoa ao merengue e envolver tudo muito bem.

Little by little, add the almond mixture to the meringue and mix it very well.


Para verificar se a mistura está pronta, retirar um bocadinho com uma colher de sobremesa para um prato. O biquinho que se forma em cima, deverá desaparecer em 10 segundos. Se isso não acontecer, a mistura deve ser mexida novamente.

Forrar um tabuleiro de forno com papel vegetal ou com um tapete próprio para macarons e com a ajuda de um saco de pasteleiro, distribuir os macarons que deverão ter o tamanho de uma moeda de 2€ aproximadamente.

To check if the macarons mixture is ready, take a little bit with a teaspoon to a plate. The small nib that comes on the top, should disappear in 10 seconds. If it doesn't happen, you need to mix it well again.

Cover a baking tray with tracing paper or with a proper macaron base and with a pastry bag, make the macarons that should have the size of a 2€ coin approximately.  


Foi esta a minha principal dificuldade!!!! That was my main problem!!!!

Deixar os macarons descansar durante cerca de 30 minutos para secar e ficarem mais brilhantes.

Colocar no forno durante 12 a 18 minutos e colocar outro tabuleiro de forno por baixo para evitar que quebrem.

Deixar os macarons descansar no tabuleiro durante 1 ou 2 horas.

Para o ganache, derreter o chocolate em banho maria e juntar as natas mornas. Misturar tudo muito bem e levar ao frigorífico para endurecer.

Rechear com o chocolate ou qualquer outro recheio a gosto.

Let the macarons rest for about 30 minutes to get dry and become shinier.

Put the macarons in the oven for about 12-18 minutes and put another baking tray down to prevent them to break.

After cooked, let them rest for about 1-2 hours.

For the ganache, melt the chocolate in a water bath and add the warm cream. Mix it very well and bring it to the fridge to cool down and get harder.

Fill the macarons with the chocolate or with another filling you prefer.


sexta-feira, 4 de julho de 2014

Cheesecake de Oreo | Oreo cheesecake


E como o sol voltou este fim de semana, e eu gosto de adaptar os doces que faço à meteorologia, escolhi um cheesecake como sobremesa para o jantar de sábado! Um jantar com amigos e amigos dos amigos que mais internacional não poderia ter sido: 6 portugueses, 1 espanhola, 1 bielorrusa, 1 iraniano, 1 chinesa e 1 norueguês! Hã?!? Não é todos os dias que se junta um grupo assim!! 

Pois bem, quis fazer uma sobremesa fresquinha (para contrastar com o tempo) e ao mesmo tempo, sem arriscar muito para que todos gostassem! Depois de uma pesquisa rápida pela internet encontrei um Cheesecake de Oreo (mais uma vez no blog Passion 4 Baking) e achei que tinha tudo para dar certo! E deu, choveram elogios! Mas, como a maioria das receitas da autora do blog, esta era também abusadoramente doce, um pecado! Pois, já disse que aqui não se contam calorias! E como nem toda a gente aguenta tanto doce como eu, pode achar um bocadinho enjoativo... Por isso, se forem sensíveis a coisas extremamente doces, aconselho a deixar apenas as duas camadas e não cobrir o cheesecake com a mousse de chocolate. E se ainda assim, acharem que é demais, podem retirar as Oreo do cheesecake (o que faz com que deixe de ser um cheesecake de Oreo, mas podem sempre dar-lhe outro nome qualquer). Tenho a certeza que a combinação do brownie super docinho com o amargo do cheesecake vai ficar óptimo e ser mais do que suficiente! 

Vejam só a sorte, em apenas um post, deixo-vos 3 receitas que podem usar separadamente ou combinar como mais gostarem! Quem é amiga, quem é? :)

The Baking Nanny


Since the sun decided to show up again this weekend and I like to adapt my cooking to the weather conditions, I chose to bake a cheesecake for desert for last saturday's dinner. A dinner party with friends from all over the place - 6 portuguese, 1 spanish, 1 belarusian, 1 iranian, 1 chinese and 1 norwegian!! (Not very often one almost recreates the UN in your dinning room)

As I said, I wanted to make a fresh desert (to balance with the weather) and, at the same time, not risking a lot so that everyone could like it! After a quick search on the Internet, I found the recipe for a Oreo Cheesecake (again in Passion 4 Baking) and I thought to myself that it had everything right to work out perfectly. And so it was - everyone loved it! But I must say that (as well as many other recipes on that blog) this one was a little too much. Almost as sweet as a sin. At the same time, I previously had the opportunity to tell you that in here we don't count the calories! And since almost no one eats as much sweet stuff as I do, you may find it to be a little over the edge on the sweetness. So, if you want, you can just make 2 layers of of it! Quit the chocolate mousse on top! If you still feel that it's too much, simply remove the Oreos from the equation - The name changes but you can always rename it as you please. I'm sure that the sweetness of the brownie mixed with the bitterness of the Oreo cheeseake will be more than good.

You are lucky today!! One post - 3 recipes that you can easily make separately or just mix it up as you please. Who's your friend, hum? :)

The Baking Nanny


CHEESECAKE DE OREO
OREO CHEESECAKE


Ingredientes
Ingredients

Para a base
To the base

80g de farinha
175g de chocolate de culinária
2 1/2 colheres de sopa de cacau
115g de manteiga sem sal
175g de açúcar amarelo
2 ovos
2 gemas de ovo
1/2 colher de chá de extracto de baunilha

80g flour
175 dark chocolate
2 1/2 tbs pure cocoa powder
115g unsalted butter
175g light brown sugar
2 eggs
2 egg yolks
1/2 tsp vanilla extract


Para o cheesecake
To the cheesecake

900g de queijo creme
280g de açúcar
4 ovos
2 colher de chá de extracto de baunilha
50g de créme fraiche
75-100g de Oreo (esmagadas grosseiramente)

900g cream cheese
285g sugar
4 large eggs
2 tsp vanilla extract
50ml sour cream
75-100g Oreo (roughly crushed)


Para a cobertura
To frosting

6 claras de ovo
120g de açúcar
100g de chocolate de culinária
1 colher de sopa de café expresso
50g de manteiga

6 egg whites
120g sugar
100g chocolate
1 tbs strong coffee
50g unsalted butter


Preparação
Preparation

Pré-aquecer o forno a 180ºC.

Derreter o chocolate com a manteiga numa taça grande em banho maria.

Desligar o lume, e mantendo a taça em banho maria, juntar o açúcar e mexer até que fique tudo bem misturado.
Pre heat the oven at 180ºC.
Put the chocolate and butter into a bowl. Place the bowl over a saucepan of simmering water, stir until everything is melted.

Turn off the heat, but leave the bowl. Add the brown sugar to the chocolate mixture, stir until everything is well blended.


Retirar a taça do calor. Juntar os ovos, as gemas e o extracto de baunilha e misturar tudo com cuidado, sem bater demais.
Remove the bowl from the heat. Add the eggs, egg yolks and vanilla extract and carefully stir to mix.


Adicionar a farinha e o cacau em pó e mexer até que fique tudo bem misturado.
Tip in the flour and cocoa powder, stir until everything is well blended.


Levar ao forno a 180ºC numa forma redonda durante apenas 30 minutos.
Bake the brownies in a 180ºC oven for 30 minutes, no longer.


Retirar do forno, reduzir para 100ºC e deixar a base arrefecer completamente.
Para o cheesecake, colocar o queijo e o açúcar numa taça e bater.
Take it from the oven, down the temperature to 100ºC and leave to cool completely.

To the cheesecake, put the cream cheese and the sugar into a mixing bowl and beat until well blended.

Juntar os ovos, um de cada vez, batendo bem entre cada adição (mas não em excesso!).
Add the eggs one at a time, beating between each addition. Do not overmix.


Juntar o extracto de baunilha, as bolachas e o créme fraiche.
Fold in the vanilla extract, Oreos and sour cream.


Colocar o cheesecake por cima da base de brownie (completamente fria) e levar ao forno a 100ºC durante 3 horas.
Pour the cheesecake mixture on to the cooled brownie base and bake in the preheated oven for 3 hours.


Para a cobertura de mousse de chocolate, derreter o chocolate com a manteiga em banho maria.
To the frosting, melt the butter and chocolate in the microwave oven.


Juntar o café e deixar arrefecer.
Add the coffee and leave to cool.


Bater as claras com o açúcar.
Whisk the 6 egg whites with the sugar.


Juntar, aos poucos, as claras em castelo à mistura de chocolate (completamente fria).
Add the whisked egg whites to the melted (and cooled) chocolate. Fold it in little by little.


Colocar no frigorífico até que o cheesecake fique pronto.
Put in the fridge until the cheesecake is ready.


Deixar o cheesecake arrefecer durante pelo menos 1 hora antes de colocar a mousse por cima.

Leave to cool for at least one hour before topping with the chocolate mousse.


Colocar o cheesecake no frigorifico durante a noite ou pelo menos 8 horas.

Put the cake in the refrigerator overnight or at least for 8 hours.


quarta-feira, 25 de junho de 2014

Bolo de beterraba com queijo creme e frutos vermelhos | Beetroot cake with cream cheese and berries


Já lá vai mais de um mês da celebração do dia nacional da Noruega, o 17 de maio! Mas como nunca é tarde demais para partilhar com vocês os meus docinhos, aqui fica a receita do bolo que fiz para celebrar este dia com a família Ravnum que tão bem nos acolheu! 

No dia 17 de maio, toda a Noruega festeja de uma forma muito particular o dia da Constituição Norueguesa ou o Nasjonaldagen. Arrisco-me a dizer que para a maioria dos noruegueses é o dia mais importante do ano, mais do que os aniversários ou o Natal! O país fica pintado de vermelho, azul e branco e em todas as cidades as pessoas, vestidas a rigor com o traje típico - Bunad - assistem ou participam nos desfiles das escolas e grupos culturais/recreativos, ao longo do dia, entre muitas outras actividades. Aqui ficam algumas fotografias tiradas pela Geisa Elmar (a mesma amiga que captura as fotos fantásticas que partilho aqui no blog) para terem uma ideia do que foi o 17 de maio aqui em Kristiansund. 

It's been more than a month since Norway's National Day, 17th of May! But it's never too late to share with you the things that I bake! :) Here is the recipe for the cake I baked to celebrate this day with the Ravnum family that welcomed us in their home (marvelously, I must add).

On the 17th of May, all the norwegians celebrate, in a very peculiar way, the Nasjonaldagen or the day where the Norwegian Constitution was born. I dare to say that for most of the people here it's the most important day of the year, even more than Christmas or birthdays! All the country is painted red, blue and white and all the people dress the typical costume - Bunad - in order to participate or simply watch the endless parades that the local city halls and clubs organize, amongst a lot more activities. Here are some pictures taken by Geisa Elmar (my friend that also captures some of my recipes with some great pictures) for you to have an idea of how the 17th of May was here in Kristiansund.


Bastante diferente do nosso 10 de junho, não acham?

Portanto, dada a importância do dia, quis fazer uma sobremesa que estivesse mais ou menos à altura! Coincidiu a altura em que encontrei o blog da Raiza Costa, uma brasileira que partilha, além de receitas lindas e fantásticas, várias técnicas de como utilizar os alimentos na doçaria, bem como as reacções químicas que ocorrem! Além disso, apresenta tudo em forma de vídeos super engraçados! Vale a pena conhecer o site - Dulce Delight. Foi lá que encontrei uma receita de um bolo red velvet feito sem corantes, apenas com beterraba, decorado com uma cobertura de queijo e frutos vermelhos! Ou seja, as cores da bandeira na Noruega! Estava encontrada a sobremesa ideal! Não arrisquei na receita original e por isso fiz umas ligeiras alterações, porque o que realmente me interessava era a parte exterior do bolo e deixei o red velvet para outra ocasião!

O meu bolo acabou por perder um bocadinho da cor quando foi ao forno, mas provavelmente foi por não ter seguido à risca a receita original. Espalhem os frutos vermelhos ao vosso gosto (não precisam de desenhar a bandeira da Noruega!) e têm um bolo óptimo e super fresquinho para uma sobremesa ou um lanche de verão! E não, não sabe a beterraba!! Confiam em mim?


So, since the day was so important, I wanted to bake something that could match it! It was about the same time I found Raiza Costa's blog, a brazilian girl that shares some beautiful and amazing recipes as well as some great techniques and also the chemical reactions that occur! Besides that, she also presents everything in some really funny videos! It's worth watch giving it a try - Dulce Delight. It was there I found the recipe of a Red Velvet cake with no artificial coloring agents and with some beetroot to replace them, and also with a red berry and cheese frosting! And these are no more than Norway's flag colors! I had found the ideal desert!! I didn't risk the whole original recipe so I made a few changes since what I really cared about was the outside. I decided to leave the Red Velvet part for the future.


My cake ended up loosing a bit of its color when it went to the oven but it was probably because I didn't follow the original script. Spread the red berries around the way you like it (you don't need to reproduce the Norwegian flag ;). They give a really fresh taste to the cake - ideal for a summer snack! And trust me - it doesn't taste like beetroot at all!!

The Baking Nanny


BOLO DE BETERRABA COM QUEIJO CREME E FRUTOS VERMELHOS
BEETROOT CAKE WITH CREAM CHEESE AND BERRIES


Ingredientes
Ingredients

1 1/2 chávena de farinha
1 pitada de sal
1 colher de chá de fermento em pó
2 colheres de sopa de cacau em pó
3 beterrabas médias
100g de manteiga sem sal (temperatura ambiente)
1 chávena de açúcar
2 ovos
1/2 chávena de iogurte natural (sem açúcar)

Para o recheio e cobertura
200g de queijo creme
5 colheres de sopa de manteiga sem sal
1 colher de chá de extracto de baunilha
Frutos vermelhos para decorar

1 1/2 cup flour
Pinch of salt
1 tsp baking powder
2 tbsp natural cocoa powder
3 medium beetroot (chopped in food processor)
100g unsalted butter at room temperature
1 cup sugar
2 eggs
1 tsp vanilla extract
1/2 cup buttermilk

To frosting
200g cream cheese (room temperature)
5 tbs unsalted butter (room temperature)
1 1/2 cups icing sugar 
1 tsp vanilla extract 
Red berries to decorate


Preparação
Preparation

Pré-aquecer o forno a 180ºC.

Descascar as beterrabas e picá-las num processador.


Numa taça, juntar a farinha, o sal, o fermento e o cacau.

In a bowl add flour, salt, baking powder and cocoa powder.


Bater a manteiga com o açúcar numa outra taça. Juntar os ovos, um a um, a baunilha e o iogurte. Bater até que o iogurte esteja incorporado.

Whisk the butter with sugar. Add the eggs (one at a time), the vanilla and buttermilk. As soon as the buttermilk goes on stop whisking it. 


Juntar esta mistura aos ingredientes secos e misturar bem.

Add this mixture to the dry ingredients and stir well. 


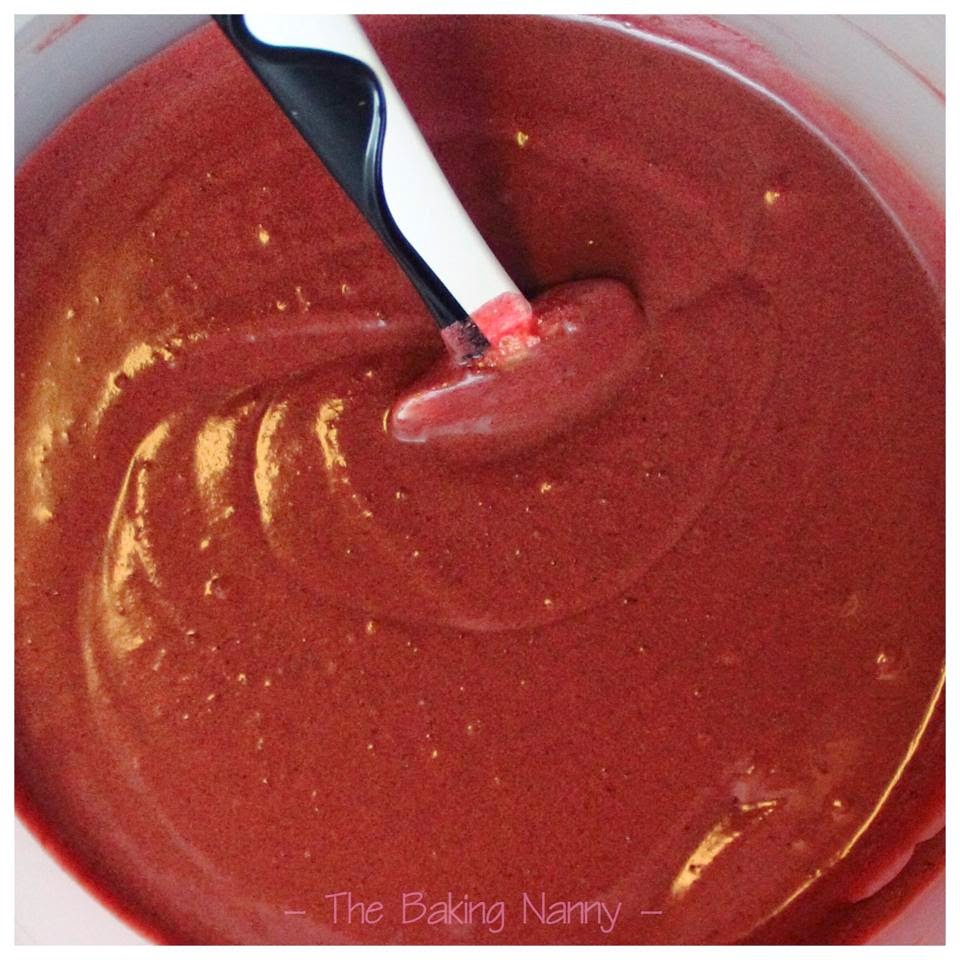
Juntar a beterraba e envolver tudo.

Add the beetroot and stir it to combine.


Levar ao forno durante 35 minutos numa forma untada com manteiga e polvilhada com farinha.

Bake the cake for approximately 35 minutes in a baking pan with butter and flour.


Para a cobertura, juntar todos os ingredientes numa taça e bater durante 5 minutos até obter uma mistura fofa.

Deixar o bolo arrefecer completamente e usar a mistura de queijo para o recheio e para a cobertura. Servir com frutos vermelhos.

To make the frosting add all the ingredients together and whisk it for 5 minutes until very fluffy and combined.

Let the cake cool completely before frosting. Serve it with red berries on top.