Mostrar mensagens com a etiqueta Queijo. Mostrar todas as mensagens

quarta-feira, 25 de junho de 2014

Bolo de beterraba com queijo creme e frutos vermelhos | Beetroot cake with cream cheese and berries


Já lá vai mais de um mês da celebração do dia nacional da Noruega, o 17 de maio! Mas como nunca é tarde demais para partilhar com vocês os meus docinhos, aqui fica a receita do bolo que fiz para celebrar este dia com a família Ravnum que tão bem nos acolheu! 

No dia 17 de maio, toda a Noruega festeja de uma forma muito particular o dia da Constituição Norueguesa ou o Nasjonaldagen. Arrisco-me a dizer que para a maioria dos noruegueses é o dia mais importante do ano, mais do que os aniversários ou o Natal! O país fica pintado de vermelho, azul e branco e em todas as cidades as pessoas, vestidas a rigor com o traje típico - Bunad - assistem ou participam nos desfiles das escolas e grupos culturais/recreativos, ao longo do dia, entre muitas outras actividades. Aqui ficam algumas fotografias tiradas pela Geisa Elmar (a mesma amiga que captura as fotos fantásticas que partilho aqui no blog) para terem uma ideia do que foi o 17 de maio aqui em Kristiansund. 

It's been more than a month since Norway's National Day, 17th of May! But it's never too late to share with you the things that I bake! :) Here is the recipe for the cake I baked to celebrate this day with the Ravnum family that welcomed us in their home (marvelously, I must add).

On the 17th of May, all the norwegians celebrate, in a very peculiar way, the Nasjonaldagen or the day where the Norwegian Constitution was born. I dare to say that for most of the people here it's the most important day of the year, even more than Christmas or birthdays! All the country is painted red, blue and white and all the people dress the typical costume - Bunad - in order to participate or simply watch the endless parades that the local city halls and clubs organize, amongst a lot more activities. Here are some pictures taken by Geisa Elmar (my friend that also captures some of my recipes with some great pictures) for you to have an idea of how the 17th of May was here in Kristiansund.


Bastante diferente do nosso 10 de junho, não acham?

Portanto, dada a importância do dia, quis fazer uma sobremesa que estivesse mais ou menos à altura! Coincidiu a altura em que encontrei o blog da Raiza Costa, uma brasileira que partilha, além de receitas lindas e fantásticas, várias técnicas de como utilizar os alimentos na doçaria, bem como as reacções químicas que ocorrem! Além disso, apresenta tudo em forma de vídeos super engraçados! Vale a pena conhecer o site - Dulce Delight. Foi lá que encontrei uma receita de um bolo red velvet feito sem corantes, apenas com beterraba, decorado com uma cobertura de queijo e frutos vermelhos! Ou seja, as cores da bandeira na Noruega! Estava encontrada a sobremesa ideal! Não arrisquei na receita original e por isso fiz umas ligeiras alterações, porque o que realmente me interessava era a parte exterior do bolo e deixei o red velvet para outra ocasião!

O meu bolo acabou por perder um bocadinho da cor quando foi ao forno, mas provavelmente foi por não ter seguido à risca a receita original. Espalhem os frutos vermelhos ao vosso gosto (não precisam de desenhar a bandeira da Noruega!) e têm um bolo óptimo e super fresquinho para uma sobremesa ou um lanche de verão! E não, não sabe a beterraba!! Confiam em mim?


So, since the day was so important, I wanted to bake something that could match it! It was about the same time I found Raiza Costa's blog, a brazilian girl that shares some beautiful and amazing recipes as well as some great techniques and also the chemical reactions that occur! Besides that, she also presents everything in some really funny videos! It's worth watch giving it a try - Dulce Delight. It was there I found the recipe of a Red Velvet cake with no artificial coloring agents and with some beetroot to replace them, and also with a red berry and cheese frosting! And these are no more than Norway's flag colors! I had found the ideal desert!! I didn't risk the whole original recipe so I made a few changes since what I really cared about was the outside. I decided to leave the Red Velvet part for the future.


My cake ended up loosing a bit of its color when it went to the oven but it was probably because I didn't follow the original script. Spread the red berries around the way you like it (you don't need to reproduce the Norwegian flag ;). They give a really fresh taste to the cake - ideal for a summer snack! And trust me - it doesn't taste like beetroot at all!!

The Baking Nanny


BOLO DE BETERRABA COM QUEIJO CREME E FRUTOS VERMELHOS
BEETROOT CAKE WITH CREAM CHEESE AND BERRIES


Ingredientes
Ingredients

1 1/2 chávena de farinha
1 pitada de sal
1 colher de chá de fermento em pó
2 colheres de sopa de cacau em pó
3 beterrabas médias
100g de manteiga sem sal (temperatura ambiente)
1 chávena de açúcar
2 ovos
1/2 chávena de iogurte natural (sem açúcar)

Para o recheio e cobertura
200g de queijo creme
5 colheres de sopa de manteiga sem sal
1 colher de chá de extracto de baunilha
Frutos vermelhos para decorar

1 1/2 cup flour
Pinch of salt
1 tsp baking powder
2 tbsp natural cocoa powder
3 medium beetroot (chopped in food processor)
100g unsalted butter at room temperature
1 cup sugar
2 eggs
1 tsp vanilla extract
1/2 cup buttermilk

To frosting
200g cream cheese (room temperature)
5 tbs unsalted butter (room temperature)
1 1/2 cups icing sugar 
1 tsp vanilla extract 
Red berries to decorate


Preparação
Preparation

Pré-aquecer o forno a 180ºC.

Descascar as beterrabas e picá-las num processador.


Numa taça, juntar a farinha, o sal, o fermento e o cacau.

In a bowl add flour, salt, baking powder and cocoa powder.


Bater a manteiga com o açúcar numa outra taça. Juntar os ovos, um a um, a baunilha e o iogurte. Bater até que o iogurte esteja incorporado.

Whisk the butter with sugar. Add the eggs (one at a time), the vanilla and buttermilk. As soon as the buttermilk goes on stop whisking it. 


Juntar esta mistura aos ingredientes secos e misturar bem.

Add this mixture to the dry ingredients and stir well. 


Juntar a beterraba e envolver tudo.

Add the beetroot and stir it to combine.
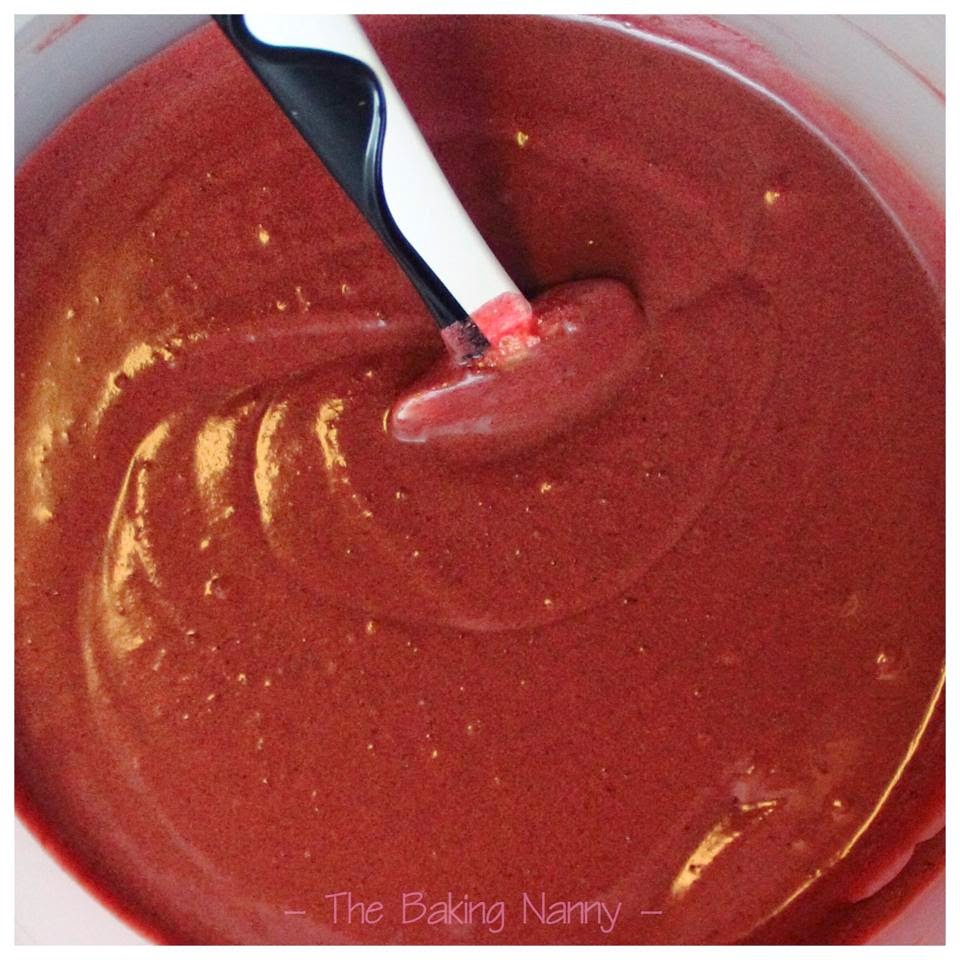

Levar ao forno durante 35 minutos numa forma untada com manteiga e polvilhada com farinha.

Bake the cake for approximately 35 minutes in a baking pan with butter and flour.


Para a cobertura, juntar todos os ingredientes numa taça e bater durante 5 minutos até obter uma mistura fofa.

Deixar o bolo arrefecer completamente e usar a mistura de queijo para o recheio e para a cobertura. Servir com frutos vermelhos.

To make the frosting add all the ingredients together and whisk it for 5 minutes until very fluffy and combined.

Let the cake cool completely before frosting. Serve it with red berries on top.


quinta-feira, 8 de maio de 2014

Compota de 3 pimentos | 3 pepper jam


Ouvi uma vez que normalmente as mulheres gostam mais de doces e os homens de salgados! Mas já conheci muitas excepções. E quanto a mim, sinceramente, ainda não sou capaz de dizer de qual gosto mais. Tal como vos disse no meu primeiro post, (todos leram, não leram?) sou perdidamente apaixonada por doces, principalmente se tiverem chocolate. Mas também, dificilmente consigo resistir a uns bons petiscos! É com o mesmo prazer que trinco uma tosta com queijo e salpicão ou um cupcake de chocolate! Por isso, fica difícil a escolha! No fundo, acho que depende apenas do momento... E vocês, conseguem dizer de qual gostam mais?

Sempre que recebo pessoas em casa para jantar/almoçar, faço questão de apresentar uma ou duas entradinhas! E normalmente, gosto de experimentar coisas novas. No entanto, os meus amigos já sabem que num jantar cá em casa a probabilidade de encontrarem a compota de 3 pimentos num frasquinho ao lado de um triângulo de queijo brie, é bastante elevada! Mas não se chateiam com isso, pelo contrário, eu sei que adoram! É uma combinação imprevisível e super saborosa! Uma óptima forma para brilharem aí em casa quando receberem visitas! E não aceito desculpas, como me disse a minha mãe, do estilo "não gosto de pimentos" porque o sabor fica completamente diferente. Garanto-vos que nem o cheiro de vinagre espalhado por toda a casa vos vai impedir de repetirem!

Foi no restaurante DOP do chefe Rui Paula no Porto que experimentei a Compota de 3 pimentos com queijo brie assado pela primeira e fiquei completamente rendida. À saída, reparei que tinha frasquinhos desta compota para venda e fiquei sempre com a vontade de experimentar fazê-la em casa... O tempo foi passando e um ano depois lembrei-me de procurar pela receita na internet. Encontrei um site com esta receita que tenho vindo a fazer cá em casa. Não me lembro do site de onde retirei e não consigo confirmar se é exactamente a mesma porque com o tempo algumas coisas podem ter escapado. Mas garanto-vos que é uma maravilha dos deuses!

Vamos lá, mãos à obra para o jantar de amanhã ou de sábado. Os convidados vão agradecer! :)

The Baking Nanny

I once heard that women are really fond of sweet things and men are fond of salty things! But in my life, I already met people that are different. As for me, I honestly can't choose between both of them. As I told you in my first post on the blog (you all read it, right??) I am completely addicted to sweets, especially if they have chocolate on them, but at the same time I can't resist to some good salty snacks! I can eat a melted cheese and chorizo sandwich with the same pleasure as a chocolate cupcake! I guess it really depends on the moment.... What about you? Do you prefer one over the other?

Whenever people come to my place for lunch/dinner, I always like to have one or two small starters! And I usually like to try new things. However, my friends already know that if they come to my place for dinner, they will likely find this "3 pepper jam" on a small jar next to a brie cheese triangle. But they don't really mind since I know that they all love it! It's a strange, unpredictable but super yummy combo! A really great way to "shine" when you get some visitors! And excuses such as "I don't like peppers" (like my mum told me) are out of the question because the final taste is completely different. I can assure you that even the smell of vinegar that will flood your place will not stop you from repeating the experience.

It was at DOP restaurant by chef Rui Paula in Porto that I tried the 3 pepper jam sided with baked brie cheese for the first time and I was completely in love with it. On my way out, I noticed that they were selling small jars of this jam and I immediately planned on making it myself... I found a website with the recipe and since then I have been making it at home. I can't remember the website's name so I can't confirm if the recipe is the exact same as the original because as time goes by you can loose some details. But I can guarantee that it's a wonder from the gods! 

So lets get to work and try it for tomorrow or saturdays dinner! Your guests will appreciate it! :)

The Baking Nanny


Compota de 3 pimentos
3 pepper jam


Ingredientes
Ingredients

1 pimento vermelho
1 pimento amarelo
1 pimento verde
1 dente de alho
1 cebola pequena
200mL de vinagre
200g de açúcar
2cm de gengibre

1 red pepper
1 green pepper
1 yellow pepper
1 garlic clove
1 small onion
200mL vinegar
200g sugar
2cm ginger


Preparação
Preparation

Cortar os três pimentos em bocados pequeninos.

Cut the peppers in small pieces.


Picar muito bem a cebola, o alho e o gengibre.

Levar um tachinho ao lume com todos os ingredientes.

Chopp the onion, the garlic clove and the ginger.

Put all ingredients in a small pan and place it at medium heat.


Deixar cozinhar em fogo baixo (mas sempre a ferver) durante 1h30 a 2 horas.

Cook it at low heat (keep it boiling) for 1h30 to 2 hours.


Retirar a tampa do tachinho e aumentar para fogo médio para reduzir o molho até ganhar a consistência de uma compota.

Remove the lit and raise the heat in order to reduce the sauce and make it "jammy".


Colocar num frasquinho e servir em tostinhas com queijo brie.

Put it on a small jar and serve with crackers and brie cheese.


quinta-feira, 1 de maio de 2014

Pizza


Buongiorno principesse e principi!

O que acham de aproveitar o feriado para dar um saltinho a Itália e fazer umas pizzas para toda a família? Para mim, qualquer dia é um bom dia para comer pizza! Sinto-me como uma criança com a expectativa que crio quando sei que o jantar vai ser pizza!!! Será possível que haja alguém neste mundo que não goste? Molho de tomate, queijo derretido... Hummmm.... Além disso, as opções não têm fim! Não há como não gostar! É claro que há pizzas e pizzas e por isso mesmo, eu prefiro fazê-las em casa, do meu jeito, como mais gosto! Tem ainda a vantagem de poder integrar qualquer dieta ou operação biquini para preparar o verão, uma vez que cada um escolhe os ingredientes que pretende usar, podendo assim controlar as calorias que ingere! Quem disse que as pizzas engordam?

Hoje deixo-vos a receita das últimas pizzas que fiz. Para mim, é sem dúvida uma das melhores pizzas que alguma vez comi! (vocês estão a pensar que esta Nanny de humildade e modéstia não tem nada!!) Há imensas receitas para a massa, disponíveis na Internet, e várias teorias sobre o tempo de repouso e levedura da massa. Não sei qual é a perfeita mas eu faço a receita do site Sabor Intenso e fica óptima. A do molho de tomate foi dada por um amigo. Quanto ao resto, uso os ingredientes que me apetece no momento. E isso cada um pode adaptar ao que mais gosta! 

Bom feriado para vocês

The Baking Nanny

How do you feel about enjoying the holiday "in Italy" baking some pizza of the whole family? To me, everyday is a good day to eat pizza! I always feel like a kid when I know that dinner is going to be pizza!! Coulde there be anyone in the world that doesn't like it?! Tomato sauce, melted cheese... Hummmm.... And also a never-ending amount of options! What's not to like? Of course that not every pizza is good pizza and for that reason I prefer making them myself, the way I like them. On top of that, there's the advantage of being able to be a part of any kind of diet (summer is around the corner) since you can choose which ingredients you want to use and therefore control the amount of calories you will eat! Who said that pizza makes you fat?

Today I leave you with the recipe for the last pizzas I baked. You may think that I'm not humble but I have to say that to me, there is no better pizza than these ones! There are different recipes for the dough available on the internet and a lot of different theories about the  amount of time for it to rest and grow. I don't really know which one is correct - I usually use the one on the "Sabor Intenso" website and it's just great. The tomato sauce recipe was given to me by a friend. As for the rest, I just use what I feel like on each occasion. The key is to have imagination!

Have a nice holiday!

The Baking Nanny


Massa de pizza
Pizza dough

550g de farinha
25g de fermento de padeiro
3 colheres de sopa de azeite
300mL de água
1 colher de chá bem cheia de açúcar
1 colher de chá bem cheia de sal fino
Farinha para polvilhar

550g flour
25g fresh baker's yeast 
3 tbs olive oil
300mL water
1 tsp full with sugar
1 tsp full with salt
Flour to powder


Preparação
Preparation

Misturar bem o açúcar, o fermento e um pouco da água numa tigela e deixar repousar durante 5 minutos.


Mix the sugar, the yeast and a little bit of water in a small bowl and let it rest for 5 minutes.


Dissolver o sal num pouco de água.

Colocar a farinha numa taça, fazer um buraco no meio e colocar o fermento, o azeite e o sal.

Dissolve the salt in a little bit of water.

Put the flour in a big bowl, make a hole in the middle and add the yeast, the olive oil and the salt.


Começar a misturar com os dedos, juntar a restante água e amassar tudo muito bem até a massa descolar dos dedos (nesta fase, é necessário dar muita porradinha na massa; vejam como uma forma de aliviar o stress!)

Start to mix it with the fingers, add the remaining water and knead it very well until the dough stops sticking to  your fingers.(at this point, you must hit the dough very hard; see that as a way to ease the stress!)


Formar uma bola, tapar com um pano e deixar levedar durante 2 horas e 30 minutos.

Make a big ball, cover with a cloth e let it grow for 2 hours and 30 minutes.


Polvilhar um balcão com farinha, colocar a massa, dividir em dois e formar uma bola de cada pedaço. (Cada bola dá para 4 pessoas. Pode ser congelada para ser usada posteriormente.)

Powder a balcony with flour, lay the dough, divide it in two and make a small ball out of each piece. (Each ball is enough for 4 people. It can be frozen to be used later.)


Esticar a massa com o rolo e quando estiver em forma de círculo, levantar com as mãos e rodar para que fique com o diâmetro desejado.

Stretch the dough with the rolling pin and when it reaches a round shape, lift it with the hands and turn it to get the desired size.


Colocar a massa num tabuleiro de forno, forrado com papel vegetal.

Lay the dough in a baking tray covered with tracing paper.


Molho de tomate
Tomato sauce

2 colheres de sopa de azeite
1 lata de tomate pelado ou polpa de tomate
1 cebola pequena muito bem picada
2 dentes de alho
1 colher de chá de malagueta vermelha picada
1 colher de chá de açúcar 
Sal

2 tbs olive oil
1 peeled tomato can
1 small onion (very well chopped)
2 garlic cloves
1 tsp red chilli chopped
1 tsp sugar
Salt


Preparação
Preparation

Num tachinho colocar o azeite, a cebola e o alho e levar ao lume até alourar.

In a small pan, mix the olive oil, the onion and the garlic and bring to boil until it is brown.


Juntar o tomate cortado aos bocadinhos, o açúcar, a malagueta e o sal (a gosto) e deixar cozinhar durante 5 minutos.

Com um garfo, esmagar grosseiramente o tomate. Se preferir o molho homogéneo, usar uma varinha mágica para passar tudo.

Com o tachinho destapado, aumentar a temperatura e reduzir o molho durante cerca de 1 minuto.

Add the tomato chopped in pieces, the sugar, the chilli and the salt and let it cook for 5 minutes.

Smash the tomato grossly with a fork. If you prefer a more homogeneous sauce, use a mixer.

Remove the pan cover and rise the temperature for 1 minute in order to reduce the sauce.


Pizza caseira
Homemade pizza

Massa de pizza
Molho de tomate
Queijo mozzarella ralado
Óregãos
Ingredientes a gosto: presunto, chouriço, peperoni, bacon, pimento, milho, cogumelos, ananás, mel, mozzarella de búfala, tomate fresco, manjericão, tomate seco, rúcula,...

Pizza dough
Tomato sauce
Grated Mozzarella cheese
Oregano
Your favorite ingredients: smoked ham, peperoni, bacon, peppers, corn, mushrooms, pineapple, honey, fresh mozzarella, fresh and dried tomato, basilic, rucola,...


Preparação
Preparation

Pré-aquecer o forno a 200ºC.

Colocar o molho de tomate por cima da massa.

Polvilhar com o queijo mozzarella e os órgãos e dispor os ingredientes escolhidos.

Pre-heat the oven at 200ºC.

Put the tomato sauce on the dough. 

Powder with the mozzarella cheese and the oregano and add the desired ingredients.


Levar ao forno durante 10-15 minutos. E deliciem-se com esta maravilha!!!!

Take it to the oven for 10-15 minutes. And delight yourself with this wonderful pizza!!!